
Files (3)
Reference shelf
Recommended filament for this print
Product references matched to the published material guidance. Confirm diameter, heat resistance, colour, and printer compatibility.
| Referenced item | What to verify | Price & availability |
|---|---|---|
| PETG filamentAmazon · Affiliate link | Amazon product page for 1.75 mm PETG; confirm colour, spool size, print temperature, seller, and delivery region. | Check price at Amazon |
| ASA filamentAmazon · Affiliate link | Amazon product page for 1.75 mm ASA; use an enclosure and suitable ventilation, and confirm seller and regional availability. | Check price at Amazon |
Affiliate disclosure: if you buy through an eligible link, 3DPrintedCarPart may earn a commission at no extra cost to you. As an Amazon Associate I earn from qualifying purchases. Confirm product specifications, compatibility, seller terms, and vehicle safety before ordering or using anything. Amazon may redirect you to a nearby supported store; otherwise the original Amazon.com page remains available.
Bolt EV Quad Lock Phone Mount
License & use
The file license permits commercial reuse, subject to any applicable attribution or share-alike terms. License status does not verify vehicle fitment, OEM rights, design patents, or safety.
Shared by
Fred Cooper (koasdx)Description
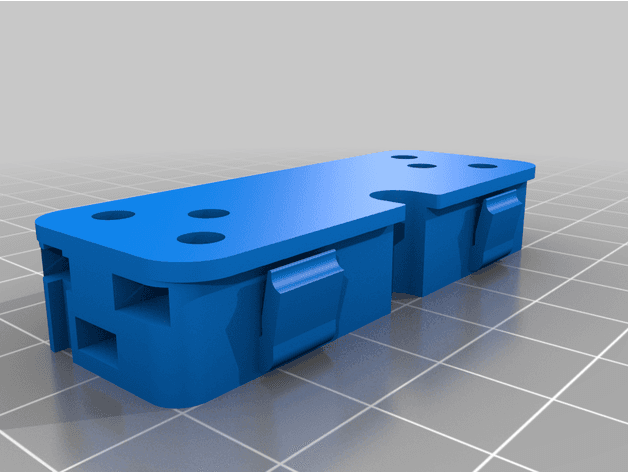
2017 - 2021 Chevrolet Bolt EV Quad-Lock phone mount assembly that replaces the unused button assembly ## Instructions ### Prepare the Button Replacement piece Print the button replacement piece (the piece with the clips) in the upright position so that the cantilever clips are printed in their strongest orientation. Install six M3 hex nuts into the button replacement piece. ### Prepare your Quad-Lock Mount For the most secure mount, I recommend applying a coat of Plastidip spray onto the socket surface. This will prevent the quad-lock ball from rotating in the socket, allowing a reduced clamping load from the thumb-nut. In very hot climates such as AZ where I use this, the vehicle can get hot enough to soften typical "high-temp" 3D printing plastics. If the plastic softens under a sufficiently high clamping load, it will deform, causing the quad-lock ball to loosen. ### Install Button Replacement Piece After disassembling the dash, remove the unused buttons. You may choose to route a cable through the empty space to retain Android Auto while your phone is mounted. Install the button replacement piece in the dash and secure it with the clamp using two M3x12 screws from behind. This theoretically ensures a tight clamp to the dash in case the cantilevered clips aren't enough to provide adequate support for your phablet. Assemble the dash with the new pieces installed. Next, grab four M3x35 screws and the quad-lock mounting part and screw it to the dash. Finally, use a suitable M4 thumb-nut (these are what I used) to secure your quad-lock wireless charging head or plain head into the new socket. BOM: 2 x M3 x 12mm hex cap screw 4 x M3 x 35mm hex cap screw 6 x M3 nuts
Compatible Vehicles
Originally published on thingiverse.com by Fred Cooper (koasdx) · License: CC BY
Browse categories
Browse other part families
Jump to interior, exterior, accessories, dashboard, mechanical, or tools hubs when you need a different kind of replacement part.
Share whether this print actually fits a real car. Installed photos and material notes make the catalog more trustworthy.
Ask the community about this part
Start a fitment, printing, or design discussion with this part already attached.
Related Parts
Finding specific fitment/category matches first.

