
Files (4)
Reference shelf
Recommended filament for this print
Product references matched to the published material guidance. Confirm diameter, heat resistance, colour, and printer compatibility.
| Referenced item | What to verify | Price & availability |
|---|---|---|
| PETG filamentAmazon · Affiliate link | Amazon product page for 1.75 mm PETG; confirm colour, spool size, print temperature, seller, and delivery region. | Check price at Amazon |
| ASA filamentAmazon · Affiliate link | Amazon product page for 1.75 mm ASA; use an enclosure and suitable ventilation, and confirm seller and regional availability. | Check price at Amazon |
Affiliate disclosure: if you buy through an eligible link, 3DPrintedCarPart may earn a commission at no extra cost to you. As an Amazon Associate I earn from qualifying purchases. Confirm product specifications, compatibility, seller terms, and vehicle safety before ordering or using anything. Amazon may redirect you to a nearby supported store; otherwise the original Amazon.com page remains available.
Raspberry Pi 7" Touchscreen Pod for Ford F250-F550 99-07
License & use
The file license permits commercial reuse, subject to any applicable attribution or share-alike terms. License status does not verify vehicle fitment, OEM rights, design patents, or safety.
Shared by
Jason Toews (Everlanders)Description
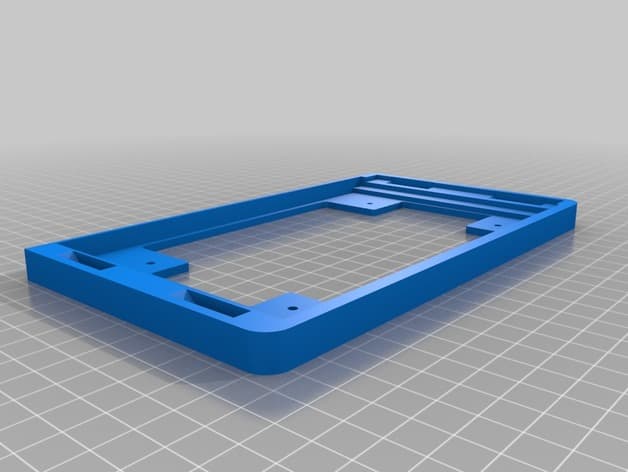
A custom overhead console/pod made to hold the Raspberry Pi 7" Touchscreen up to the roof on a Ford Superduty Truck. Used as a rear view mirror and Android Auto head unit. The hole of on the top side lined up with an already existing hole centred in the crossmember in the roof. I just use a threaded insert (nutsert) to provide a 1/4 20 threaded mounting point. The vents in the back channel air over the DC/DC converter shown in the videos. The 4 mounting ears should be printed laying down for the most strength and have provisions for flanged nuts (installed backwards) and can be held in place with a dot of silicone. Flat head screws sit flush with the outside of the enclosure, however it is very easy to split the case if overtightened. These are the black oxide screws and nuts I used: https://www.mcmaster.com/#96640a166/=1cnjh7d https://www.mcmaster.com/#93083a102/=1cnjhii The videos showing the install are here: https://www.youtube.com/watch?v=Puk_pzMGd7c This video outlines the hardware and how I installed it. https://www.youtube.com/watch?v=jFXxtxoi_pc This video shows how it's wired up and the code to switch cameras and brightness. https://www.youtube.com/watch?v=lpzkHvQA-t8 And lastly, this video shows the 3D printed camera pods and the Display pod.
Compatible Vehicles
Originally published on thingiverse.com by Jason Toews (Everlanders) · License: CC BY
Browse categories
Browse other part families
Jump to interior, exterior, accessories, dashboard, mechanical, or tools hubs when you need a different kind of replacement part.
Share whether this print actually fits a real car. Installed photos and material notes make the catalog more trustworthy.
Ask the community about this part
Start a fitment, printing, or design discussion with this part already attached.
Related Parts
Finding specific fitment/category matches first.

