
Files (1)
Reference shelf
Recommended filament for this print
Product references matched to the published material guidance. Confirm diameter, heat resistance, colour, and printer compatibility.
| Referenced item | What to verify | Price & availability |
|---|---|---|
| PETG filamentAmazon · Affiliate link | Amazon product page for 1.75 mm PETG; confirm colour, spool size, print temperature, seller, and delivery region. | Check price at Amazon |
| ASA filamentAmazon · Affiliate link | Amazon product page for 1.75 mm ASA; use an enclosure and suitable ventilation, and confirm seller and regional availability. | Check price at Amazon |
Affiliate disclosure: if you buy through an eligible link, 3DPrintedCarPart may earn a commission at no extra cost to you. As an Amazon Associate I earn from qualifying purchases. Confirm product specifications, compatibility, seller terms, and vehicle safety before ordering or using anything. Amazon may redirect you to a nearby supported store; otherwise the original Amazon.com page remains available.
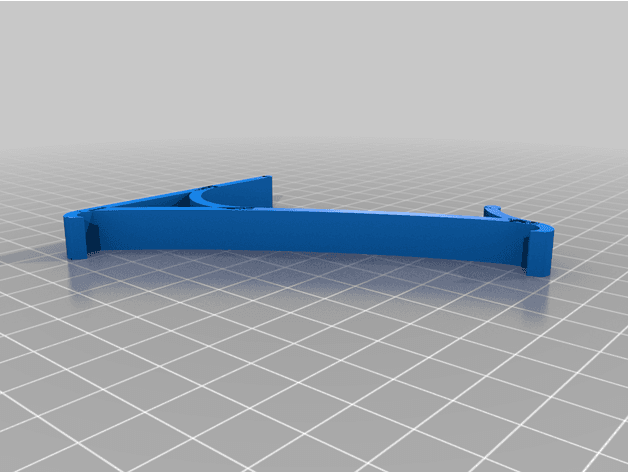
Toyota Aygo Center mount - basic file
License & use
The file license permits commercial reuse, subject to any applicable attribution or share-alike terms. License status does not verify vehicle fitment, OEM rights, design patents, or safety.
Shared by
Axel Teichmann (OSXtraveller)Description
This is a basic mount for the Toyota Aygo 2014-2021, to the right of the centre console. The thing is designed to be only 10mm high so that anyone can construct whatever they want out of it. I can only see it being used as a mobile phone or cup holder, but let's see what Remix culture makes of it. Included is the Blender file in which I developed the whole thing, plus a tutorial (JPG) (German and English) on how I took the measurements for it to show how I approach such a development of such a thing - especially if it has a lot of curves. I'm sure there's an easier way, but I've always managed to do it this way, so it can't be that wrong. I'm looking forward to seeing what developments come out of this thing. Short, this is what I have done to produce this: 1. take the measurements directly on the original object with paper and draw the whole thing. 2. scan the whole thing and convert it to SW/WS and save it as PNG with transparent background. 3. convert the bitmap into a vector file in Inscape and save it as SVG. 4. import the SVG file in Blender and bring it to the dimensions of the handwritten drawing - scale the object to 2mm thickness and start a test print. 5. test the print on the object on site, mark any conspicuous features. 6. rebuild the object with the normal basic bodies in Blender until you like it. 7. make a new test print with a thickness of 10mm to see how it behaves as a thick component (haptics). 8. the basic part is ready - let's see what the remix culture makes out of it. - - - - - - - - - Dieses ist eine Grundhalterung für den Toyota Aygo 2014-2021, rechts neben der Mittelkonsole. Das Ding ist nur auf 10mm höhe entworfen damit jeder daraus konstruieren kann was auch immer er möchte. Ich sehe da nur eine Verwendung als Handy oder Getränkehalter, aber mal sehen was die Remix Kultur daraus macht. Mitgeliefert wird die Blender Datei in der ich das ganze entwickelt habe, ausserdem eine Anleitung (JPG) (Deutsch und Englisch) wie ich die Maße dafür genommen habe um mal aufzuzeigen wie ich an solch eine Entwicklung so eines Dinges heran gehe - gerade wenn es viele Kurven hat. Es gibt garantiert einen einfacheren weg, aber ich habe es bisher immer so hinbekommen, also kann der Weg nicht so falsch sein. Ich bin gespannt was für Entwicklungen sich aus diesem Ding ergeben. Kurz zusammen gefasst was ich gemacht habe um dieses Ding zu entwerfen: 1. Mit Papier direkt am Original Objekt die Maße nehmen und das ganze abzeichnen. 2. Das ganze einscannen und in SW/WS umwandeln als PNG mit Transparenten Hintergrund speichern 3. In Inscape die Bitmap in eine Vector Datei umwandeln und als SVG speichern. 4. In Blender die SVG Datei importieren und auf die Maße von der Handschriftlichen Zeichnung bringen - das Objekt auf 2mm Dicke skalieren und einen Testdruck starten. 5. Den Testdruck am Objekt vor Ort testen, evtl Auffälligkeiten markieren. 6. Mit den normalen Grundkörpern in Blender das Objekt nachbauen bis es einem gefällt. 7. Neuer Testdruck mit 10mm Dicke um zu sehen wie es sich als dickes Bauteil verhält (Haptik) 8. Das Grundteil ist fertig - mal sehen was die Remix Kultur daraus bastelt.
Compatible Vehicles
Originally published on thingiverse.com by Axel Teichmann (OSXtraveller) · License: CC0
Browse categories
Browse other part families
Jump to interior, exterior, accessories, dashboard, mechanical, or tools hubs when you need a different kind of replacement part.
Share whether this print actually fits a real car. Installed photos and material notes make the catalog more trustworthy.
Ask the community about this part
Start a fitment, printing, or design discussion with this part already attached.
Related Parts
Finding specific fitment/category matches first.

