
Slice the required model files; source file size is not printable volume.
Use the slicer's filament total; STL/3MF byte size is not a cost input.
Slice with the recommended material, infill, orientation, and supports.
| STL file | Role | Source size | PETG / ASA 20% | PETG / ASA 25% | 100% solid | Recommendation |
|---|---|---|---|---|---|---|
| No printable model files are available for an estimate yet. | ||||||
Saved setup guidance is used for material, infill, support, and per-file recommendation text; editable numbers are planning estimates only.
Joying Head Unit Screen Mount for Jaguar XK8/XKR

Shared by
3DPrintedCarPartDescription
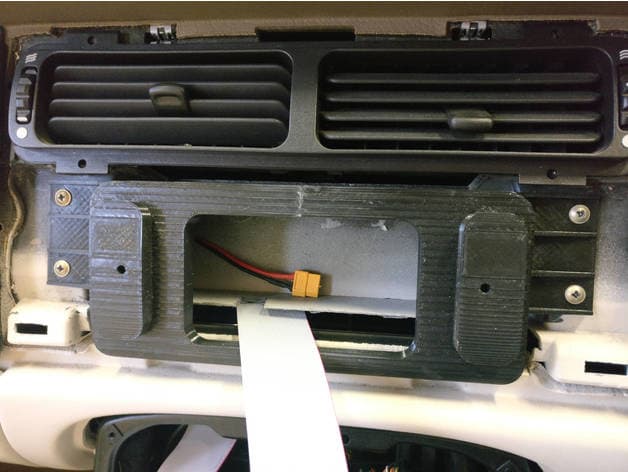
This is my design for a mount to fix an 8 inch Joying car head unit LCD screen into a Jaguar XK8/XKR. The good thing about the Joying units is that the LCD screen is seperate from the single DIN head unit and is attached by a ribbon cable. The mount is designed to cover the hole left when the obsolete factory fitted sat nav unit is removed. No permanent modification is required to the car dash at all and it can be reverted to the factory fitted unit in around 30 minutes. It consists of two parts. Firstly the lower mount is fitted which uses the same fittings as the original unit. Then the veneered dash panel is fitted over the top. Then there is the main screen bezel which screws onto the lower mount using M4 countersunk machine screws. The Joying LCD screen has 4 small screws (2 top & 2 bottom) which need to be removed, then the screen is fitted into the bezel and slightly longer screws fitted in their place through the plastic bezel into the original screw holes. The lower screen mount has an embedded M4 nut and washer on each side for the main bezel to screw on to. Therefore when printing the lower screen mount the print needs to be paused at 17mm (end of layer 85 with 0.2mm layer height) and an M4 nut and washer inserted on each side before resuming the print. Because the lower mount is quite large I have also included it as two halves that can be glued together. Underneath there are two slots to allow a piece of 1mm thick steel plate to be glued into the slot to joint the two halves together and give it strength. Epoxy adhesive is the best thing for this. As this piece is hidden behind the dash it doesn't matter if it doesn't look too pretty. I attached some black felt to the rear of the bezel where it will contact the veneered dash to prevent it rubbing and damaging the lacquer finish on the veneer. Here is a youtube video showing the finished item. https://youtu.be/BXe5l0bv-Bk https://www.joyingauto.com/single-din-car-radio/8-inch-single-din.html
Originally published on thingiverse.com by Russell Spearing (Russell_S) · License: CC BY-NC-SA
Share whether this print actually fits a real car. Installed photos and material notes make the catalog more trustworthy.
Related Parts
Finding specific fitment/category matches first.

