
Files (3)
Reference shelf
Recommended filament for this print
Product references matched to the published material guidance. Confirm diameter, heat resistance, colour, and printer compatibility.
| Referenced item | What to verify | Price & availability |
|---|---|---|
| PETG filamentAmazon · Affiliate link | Amazon product page for 1.75 mm PETG; confirm colour, spool size, print temperature, seller, and delivery region. | Check price at Amazon |
| ASA filamentAmazon · Affiliate link | Amazon product page for 1.75 mm ASA; use an enclosure and suitable ventilation, and confirm seller and regional availability. | Check price at Amazon |
Affiliate disclosure: if you buy through an eligible link, 3DPrintedCarPart may earn a commission at no extra cost to you. As an Amazon Associate I earn from qualifying purchases. Confirm product specifications, compatibility, seller terms, and vehicle safety before ordering or using anything. Amazon may redirect you to a nearby supported store; otherwise the original Amazon.com page remains available.
Saab 9-3 / Opel insignia / Cadillac wiper arm bushing replacement
License & use
The file license permits commercial reuse, subject to any applicable attribution or share-alike terms. License status does not verify vehicle fitment, OEM rights, design patents, or safety.
Shared by
Danielle Morén (Peuxy)Description
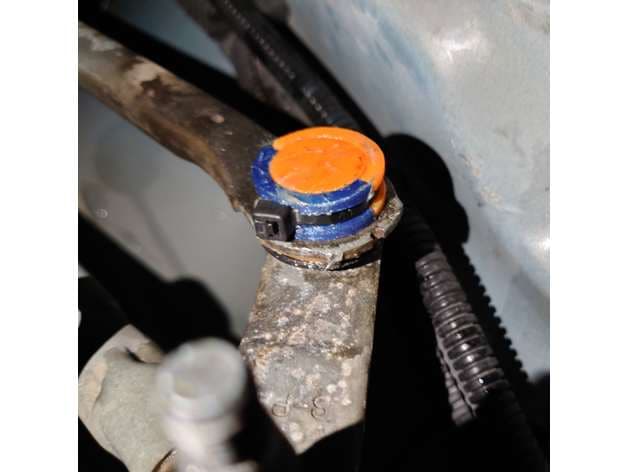
This is a replacement part for the wiper linkage/wiper arm bushing which typically fails in cold weather or due to age. Unfortunately you are not able to buy this part new, instead you are forced to buy the whole assembly which is complicated to replace and unnecessary for such a small part. And sometimes you can find a kit to replace these on ebay but they are expensive, so i made my own design. For this part you will need to print all the parts on the page and one zip tie that is around 3.5-4mm wide. Print the part without supports with the "slice" facing down on the build plate and a 2mm brim around it, 4 perimeters, 80% infill. Before assemblying make sure to clean all the old grease away then apply new suitable grease on both the plastic and the ball joint. Assemble according to photos above. If you found this useful, please donate what you think it is worth to my paypal.me. Help cover the time of design. Thanks, Enjoy!
Compatible Vehicles
Originally published on thingiverse.com by Danielle Morén (Peuxy) · License: CC BY
Browse categories
Browse other part families
Jump to interior, exterior, accessories, dashboard, mechanical, or tools hubs when you need a different kind of replacement part.
Share whether this print actually fits a real car. Installed photos and material notes make the catalog more trustworthy.
Ask the community about this part
Start a fitment, printing, or design discussion with this part already attached.
Related Parts
Finding specific fitment/category matches first.

